

Your pristine tile floors represent a significant investment in your home’s aesthetic, yet nothing diminishes that premium feel faster than darkened, soiled grout lines. Most Victoria homeowners have experienced the frustration of back-breaking scrubbing that yields mediocre results, often while worrying about the impact of harsh, toxic chemicals on their family’s health. It’s a common struggle in our coastal climate; despite Greater Victoria’s exceptionally soft water, everyday dirt and organic contaminants find a permanent home in the porous structure of unsealed grout.
At Sani-Tech Victoria, we’ve spent over 40 years perfecting the art of hard surface restoration across the South-Vancouver Island area. We understand that you want a meticulous clean without the lingering “chemical” smell or the wasted hours. This professional guide explains exactly how to remove stains from grout using advanced, pH-balanced chemistry that lifts deep-set grime without damaging the surrounding tile. You’ll discover the most effective, fibre-safe methods to restore your floor’s original lustre and learn the sealing techniques we’ve used since 1983 to ensure those bright results actually last.
Key Takeaways
- Understand the porous nature of cement-based grout and how capillary action draws liquid spills deep into your floor’s structure.
- Learn how to remove stains from grout using a safe “First Aid” kit of baking soda and hydrogen peroxide while avoiding acidic cleaners that can etch natural stone.
- Address Victoria’s specific environmental challenges, focusing on coastal humidity and mildew prevention for homes in Sidney and Sooke.
- Recognize the vital importance of penetrating sealers as a long-term maintenance strategy to keep your tile lines bright and hygienic.
- Identify the critical signs-such as crumbling grout or systemic staining-that indicate it is time to transition from DIY efforts to professional restoration.
Why Grout Stains: The Science of Porous Surfaces
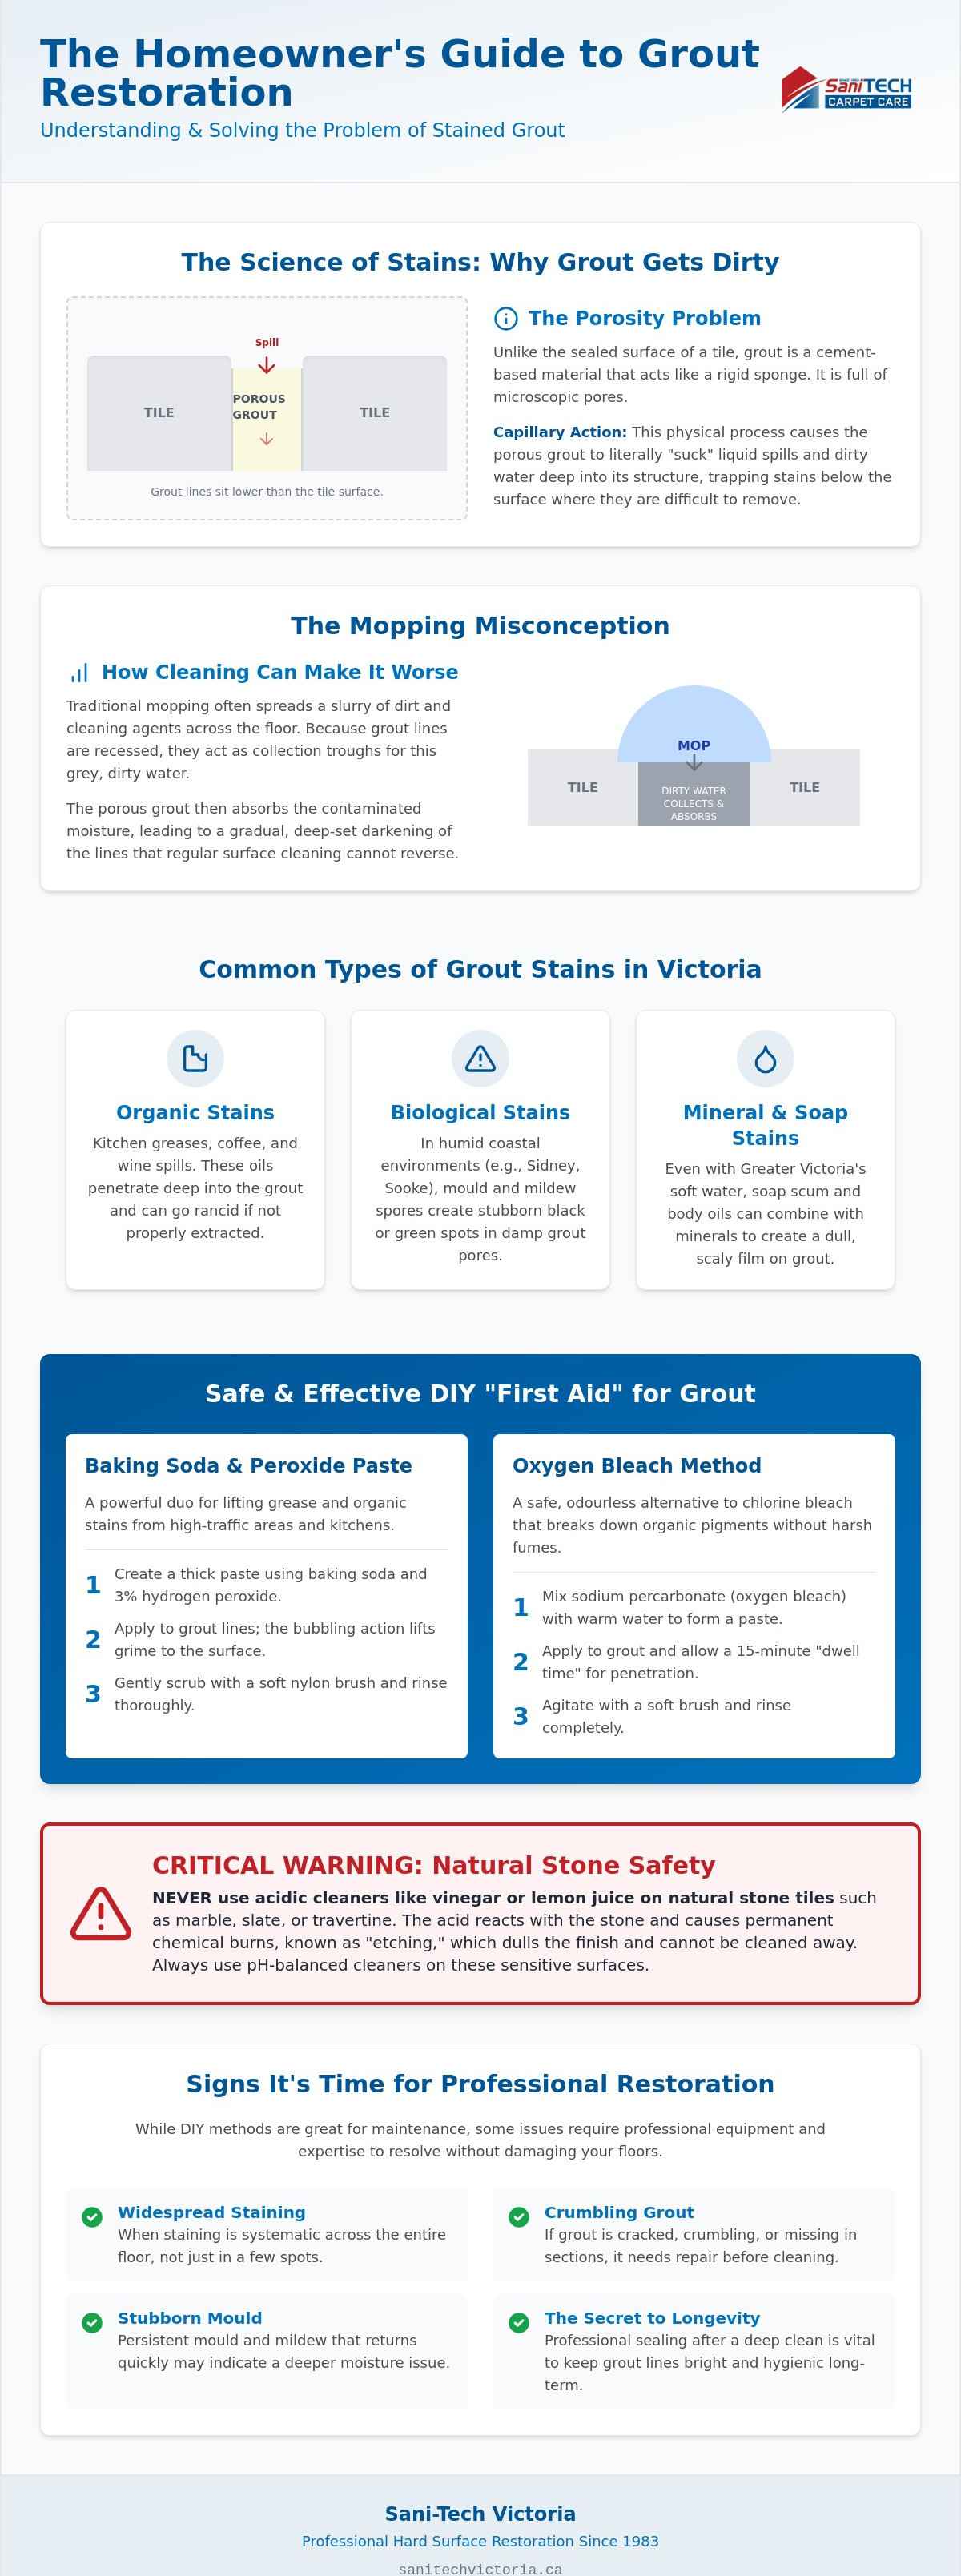
To understand What is Grout?, you must look past its solid appearance. Grout is a cement-based material that remains naturally porous and absorbent throughout its lifespan. Unlike the glazed, impermeable surface of a ceramic or porcelain tile, grout behaves like a dense, rigid sponge. This is due to a physical phenomenon known as capillary action. When a liquid spill occurs, the microscopic pores within the grout structure literally “suck” the liquid downward. This creates a significant challenge for those trying to learn how to remove stains from grout, as the pigment is often no longer on the surface but trapped deep within the substrate.
Traditional mopping often makes this problem worse. As you move a mop across the floor, the water quickly becomes a slurry of suspended dirt and cleaning agents. Because the grout lines sit slightly lower than the tile surface, they act as collection troughs for this grey water. The porous channels then absorb the dirty moisture. This leads to a gradual darkening of the lines that regular cleaning cannot reverse. It’s the primary reason floors often look “dirty” even immediately after a thorough mopping session. Understanding the difference between surface-level soil and deep-set pigment is the first step toward true restoration.
Common Types of Grout Stains
- Organic stains: These include kitchen greases, coffee, and wine spills common in Victoria households. These oils penetrate deep and go rancid if not properly extracted.
- Biological stains: In the humid environments of bathrooms in Sidney or Sooke, mould and mildew spores find a perfect home within the damp pores. This creates those stubborn black or green spots.
- Mineral stains: While Greater Victoria enjoys very soft water, soap scum and body oils can still combine with trace minerals to create a stubborn “scale” that dulls the grout’s finish.
The Porosity Problem
The core issue is the material’s physical makeup. Scientifically, grout porosity is the ratio of void spaces to the total volume of the material. These microscopic “valleys” trap soil, proteins, and bacteria that standard nylon brushes simply cannot reach. Beyond aesthetics, unsealed grout becomes a magnet for allergens, compromising the hygienic environment of your home. Professional restoration is often the only way to effectively reach these depths. Knowing how to remove stains from grout requires an awareness that surface scrubbing is rarely enough to address the contaminants living inside these microscopic voids. Without a proper seal, the cycle of absorption and staining will continue indefinitely.
Safe DIY Methods to Remove Stains From Grout
Maintaining the pristine appearance of your home shouldn’t involve hazardous fumes or aggressive tools that damage your surfaces. While many online guides suggest using wire brushes, these are far too abrasive and can easily scratch your tile or erode the grout itself. Instead, a meticulous approach uses gentle chemistry to lift contaminants. If you’re looking for how to remove stains from grout without compromising the integrity of your floors, the best “First Aid” kit consists of baking soda, hydrogen peroxide, and a soft-bristled nylon brush.
A critical warning for Victoria homeowners: avoid acidic cleaners like pure vinegar or lemon juice if you have natural stone tiles like marble, slate, or travertine. Acid reacts with the calcium carbonate in the stone, causing permanent “etching” or dull spots that no amount of cleaning can fix. For these delicate surfaces, pH-balanced solutions are the only professional-grade choice for home maintenance. Relying on the right chemistry protects your investment while ensuring a hygienic environment for your family.
The Oxygen Bleach Method
Sodium percarbonate, or oxygen bleach, releases oxygen when mixed with warm water. This safe oxidizing agent breaks down organic pigments without harsh fumes. Apply a thick paste to the grout lines and let it sit for 15 minutes. This dwell time allows the solution to penetrate the pores. Gently agitate with a nylon brush before rinsing. It’s a safer, odourless alternative to chlorine bleach for your family.
The Baking Soda and Peroxide Power-Duo
For oily kitchen spills or high-traffic foyers, a mixture of baking soda and 3% hydrogen peroxide is highly effective. The chemical reaction creates a mild bubbling action that physically lifts grease to the surface. It’s excellent for organic discolouration. Always wear gloves and ensure proper ventilation, especially in compact bathrooms. If these home remedies don’t reach your standards, we provide professional grout and tile cleaning using advanced extraction tools.
The final, most overlooked step in any DIY process is rinsing and neutralizing. After scrubbing, you must remove all residue with clean water. If cleaning agents are left behind, they act as a magnet for new dirt; this causes your floors to re-soil faster than before. A thorough rinse ensures the grout is truly clean and prepared for the next essential step: applying a high-quality sealer to prevent future stains from taking hold.
Victoria’s Unique Challenges: Water Quality and Mould
Living on the West Coast presents specific environmental factors that complicate floor maintenance. While many regions struggle with heavy lime scale from hard water, Greater Victoria actually has very soft water, with a median hardness of just 17.4 mg/L. This means the “white film” you see on your bathroom tile isn’t usually calcium carbonate. Instead, it’s often a stubborn combination of soap scum, body oils, and trace minerals that bond to the porous grout. If you’re researching how to remove stains from grout in a local context, you must address these organic bonds rather than just reaching for a de-scaler.
Another common frustration for South-Island residents is the “wicking” effect. You might spend an afternoon scrubbing a foyer or kitchen floor only to have the dark spots reappear 48 hours later. This happens because the liquid stain was trapped deep in the cementitious structure. As the grout dries, the moisture carries the remaining pigment back to the surface through capillary action. Professional-grade extraction is often the only way to pull these contaminants out entirely; it prevents the cycle of stains “rising from the dead” after a DIY session.
Managing Soap Scum and Trace Minerals
The hazy, crusty film that dulls your tile’s appearance is usually a byproduct of our soft water interacting with fatty acids in soaps. This creates a sticky “curd” that traps dirt and skin cells within the grout’s microscopic valleys. Local homeowners should realize that scrubbing harder with a stiff brush won’t remove these minerals; it often just pushes the slurry deeper. A better approach involves using a mild alkaline cleaner to break down the oils before gently agitating the surface. This protects the integrity of your grout while restoring its original colour.
Mould and Mildew Prevention
The coastal humidity in areas like Sidney and Sooke creates a perfect breeding ground for biological growth. High humidity levels in South-Island bathrooms can lead to stubborn mildew that compromises both your grout health and your indoor air quality. Natural inhibitors like tea tree oil or grapefruit seed extract can serve as effective maintenance tools between deep cleans. However, if the growth has penetrated behind the tile or covers a systemic area, it may require professional disinfecting services victoria bc to ensure the environment is truly hygienic. Maintaining proper airflow and utilizing a dehumidifier are essential steps to keep these biological stains from returning to your porous surfaces.
The Secret to Longevity: Grout Sealing and Maintenance
Cleaning your floors is only half the restoration process. If you have spent hours researching how to remove stains from grout and successfully lifted the grime, your next priority must be protection. Without a high-quality sealant, those newly opened pores act like a vacuum for the next spill. Grout sealing is the single most important step in floor care; it fills the microscopic voids within the cementitious material to create a moisture-repellent barrier that keeps contaminants on the surface.
Professional restorers generally recommend penetrating sealers over topical alternatives. Penetrating sealers sink deep into the grout to protect from within without altering the natural appearance or slip-resistance of your tile. In contrast, topical sealers sit on the surface; these can peel, trap moisture, or create an unattractive “plastic” look over time. To determine if your current barrier is intact, perform the “Water Drop Test.” Simply place a few drops of water on a clean grout line. If the water beads on the surface, your protection is holding. If the grout darkens and absorbs the liquid within seconds, it is time for a professional reseal.
Regular tile and grout cleaning victoria ensures that the sealer remains effective for its intended lifespan. Dirt and grit act like sandpaper underfoot, slowly grinding away the protective layer as people walk across the floor. By keeping the surface clear of abrasive contaminants, you extend the years between deep restoration sessions and maintain that original lustre.
How to Apply Grout Sealer
Success depends on patience. You must ensure the grout is completely dry, which typically takes 24 to 48 hours after a deep clean. Apply the sealer evenly using a sponge or a specialized applicator brush, ensuring every centimetre of the line is saturated. A critical step is wiping the excess sealer off the tile face within minutes. If left to dry on the glazed tile, it can form a stubborn, cloudy haze that is difficult to remove without professional equipment.
A Pro-Level Maintenance Schedule
- Weekly: Use a damp mop with a neutral pH cleaner to remove surface dust and prevent soil buildup.
- Monthly: Conduct a deep-clean inspection of high-traffic areas like entryways and kitchen “work triangles.”
- Annually: Schedule a professional assessment to ensure your protective barrier hasn’t been compromised by furniture movement or heavy use.
Maintaining a premium home environment requires more than just occasional effort. For those who value a meticulous, worry-free result, we offer expert tile sealing and restoration services tailored to Victoria’s unique coastal conditions.
When to Call Sani-Tech Victoria for Professional Restoration
While the home remedies discussed in previous sections are effective for minor spills, they often fall short when faced with years of accumulated soil or systemic discolouration. If your grout is crumbling, cracked, or missing in sections, stop scrubbing immediately. Aggressive DIY cleaning on compromised grout can force moisture behind the tile, leading to structural damage or hidden mould growth. At this stage, your floor requires the clinical precision of a restoration specialist rather than a standard household cleaner.
Many homeowners reach a point of exhaustion after realizing that how to remove stains from grout on a large scale is a monumental task. When stains are systemic across an entire kitchen, foyer, or bathroom suite, manual scrubbing rarely provides a uniform result. You may end up with patchy lines that vary in shade. Sani-Tech Victoria utilizes high-pressure steam extraction technology that DIY tools simply cannot match. Our equipment doesn’t just move dirt around; it physically pulls contaminants out of the pores and away from your home environment.
A truly healthy home extends beyond the floors. We believe in a holistic approach to hygiene, which is why many of our clients pair their tile restoration with organic mattress cleaning. By combining advanced surface care with deep fabric sanitization, you create a living space that is as safe as it is beautiful. Our methods prioritize your family’s well-being by avoiding the harsh VOCs found in many commercial cleaning products.
Our Meticulous Tile and Grout Process
We treat every home with the respect it deserves. Our process begins with a pre-treatment using family-safe, non-toxic emulsifiers. These agents break down the molecular bond between grease and the grout surface. We then follow with high-heat steam extraction, using specialized tools that contain the water and suction simultaneously. This ensures your walls and baseboards stay dry while the grout is purged of deep-set grime. Finally, we apply a professional-grade penetrating sealer to lock out future moisture and pigments.
Serving Our Vancouver Island Community Since 1983
Experience matters when dealing with the diverse housing stock of the South-Island. We have provided premium care for heirloom homes and modern builds alike for over four decades. As a locally owned and operated business, we take immense pride in our reputation for reliability across Victoria, Sidney, Sooke, and Mill Bay. We don’t settle for average results, and we don’t expect you to either. If you’re tired of “dirty” looking floors despite your best efforts, it’s time to experience a professional transformation. Contact Sani-Tech Victoria for a professional grout assessment today.
Restore Your Home’s Original Lustre Today
Achieving pristine tile floors is a two-part journey that combines diligent home maintenance with professional restoration. You now understand that how to remove stains from grout effectively requires more than just surface scrubbing; it demands an appreciation for the material’s porous nature and the environmental challenges unique to Vancouver Island. From managing soap scum in Victoria’s soft water to preventing mildew in the humid climates of Sooke and Sidney, your floors deserve a meticulous approach that prioritizes both beauty and hygiene.
Since 1983, Sani-Tech Victoria has provided Greater Victoria with premium hard surface care. Our expert technicians utilize family-safe, organic cleaning methods to lift deep-set contaminants that standard mops simply cannot reach. Don’t let darkened grout lines diminish the value of your home. Take the first step toward a worry-free, professional result by securing your assessment with our seasoned team. Book Your Professional Tile and Grout Cleaning in Victoria. Your floors are the foundation of your home’s aesthetic, and with the right care, they’ll stay bright and welcoming for years to come.
Frequently Asked Questions
Can I use vinegar and baking soda to clean grout?
You can safely use baking soda, but you should avoid vinegar if your floors contain natural stone like marble, slate, or travertine. Vinegar is highly acidic and will permanently etch these sensitive surfaces; it can also weaken the mineral structure of the grout over time. For the safest results, we recommend a mixture of baking soda and hydrogen peroxide. This combination creates a mild chemical reaction that lifts dirt without the risk of chemical burns on your tile.
How often should I have my grout professionally sealed in Victoria?
Most homes in the Greater Victoria area require professional sealing every one to three years. This timeframe depends heavily on the volume of foot traffic and the humidity levels in your home. High-use areas like kitchens and entryways often need more frequent attention than guest bathrooms. We suggest performing the “Water Drop Test” every six months. If water absorbs into the grout instead of beading on top, your protective barrier has likely worn away.
Is it better to clean or just replace stained grout?
Professional cleaning is almost always the better choice unless the grout is physically crumbling or falling out of the joints. Our high-heat extraction process can remove nearly all deep-set discolouration that homeowners find impossible to scrub away. Replacing grout is an incredibly messy, expensive, and time-consuming project that carries a high risk of chipping your tiles. A professional restoration can typically achieve like-new results at a fraction of the cost and hassle.
Does steam cleaning damage grout lines over time?
Professional steam cleaning is entirely safe for your floors when performed by experienced technicians with calibrated equipment. In fact, it’s the most effective way to sanitize your home without relying on aggressive, toxic chemicals. Damage only occurs when unqualified operators use excessive pressure or if the grout was already structurally failing. Our specialized tools are designed to gently lift contaminants while preserving the integrity of the cementitious bond between your tiles.
Why does my grout look dark even after I’ve scrubbed it?
Grout often remains dark because the contaminants are trapped deep within the porous structure where brushes cannot reach. This often happens due to “wicking,” where dirty mop water is sucked into the grout’s microscopic valleys and dries there. If you are frustrated by how to remove stains from grout that won’t come clean, it usually means the soil has become a systemic part of the material. Only professional-grade high-heat extraction can pull these deep-set pigments to the surface.
Are your grout cleaning solutions safe for pets and children?
Yes, we prioritize the health of your family by using organic, non-toxic cleaning agents that are completely safe for pets and children. We recognize that your loved ones spend significant time in direct contact with your floors, so we strictly avoid harsh VOCs and corrosive acids. Our meticulous process leaves your home hygienic and residue-free. This commitment to safety has been a cornerstone of our service across the South-Vancouver Island area for over 40 years.
How long does it take for grout to dry after a professional deep clean?
Grout typically feels dry to the touch within two to four hours, though it requires a full 24 to 48 hours to cure completely before we can apply a sealer. We recommend avoiding heavy foot traffic and keeping pets off the area for the first few hours following the service. Ensuring the grout is bone-dry before sealing is a critical step; this prevents moisture from being trapped, which could otherwise lead to cloudiness or a compromised protective bond.
Can you remove permanent dye or ink stains from grout?
We can often significantly lighten or entirely lift dye and ink stains, though the final result depends on the depth of the pigment’s penetration. Because grout is highly absorbent, permanent markers or hair dyes can travel deep into the cement structure. If how to remove stains from grout remains a challenge after high-pressure extraction, we can discuss colour-sealing. This advanced process uses a pigmented sealer to perfectly mask the stain while providing a durable, fresh protective layer for the future.